RaspberryPI and a-gsm shield can communicate together in two ways: using the RPI serial port (TXD0 + RXD0) or via the USB connection. The second one is quite useful when the RPI serial port it is not available (Eg. it's designated to support serial communication with some GNSS as our b-gnss shield or any other module / task).
IMPORTANT: This tutorial it's based on RPI B/RPI B+/RPI2 usage, but can easely ported to RPI A or RPI A+. You must identify the RPI A pin configuration.
What you need
- Raspberry PI model B+ or Raspberry PI2 model B (Raspberry PI A+ can be used. You must hack the wiring) 1 pcs http://raspberrypi.org
- power supply for Raspberry PI 1 pcs
- a-gsm shield v2.064 1 pcs. a-gsm shield distributors or order online
- GSM (2G) SIM card, for a-gsm 1 pcs
- optional (read bellow) power supply for the a-gsm shield (5V, ~1A... any decent Android phone/iPhone power adapter with uUSB type B connector) 1 pcs
- USB cable and connection wires
General considerations and references
All shell commands must be run as root or using roots right. "sudo your_command"
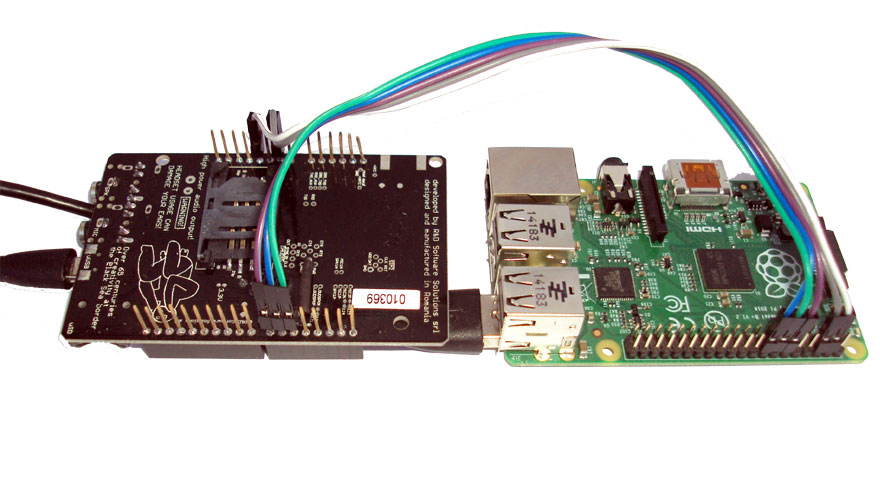
Connections (logical and powering) reference

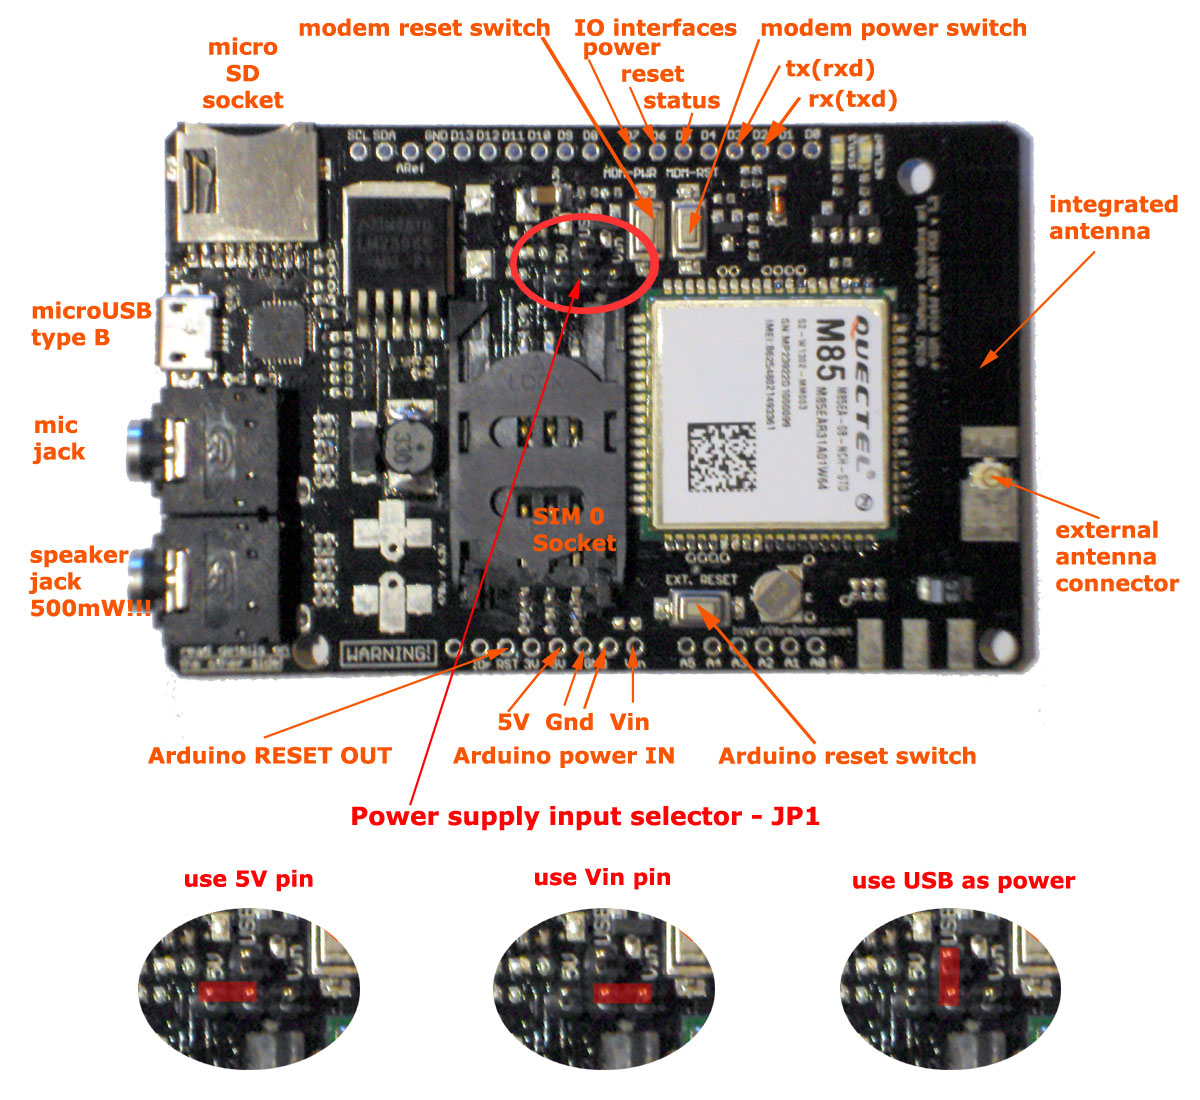
The drawings uphere may be used as general wiring guidelines, but in order to chose your final configuration you must read the sections bellow.
Mandatory for RPi serial for connection with a-gsm (skip this is you may use the USB connection).
Make available the RPI serial: use vi or mcedit or any other editor at your convenience. Comment last "/etc/inittab" line:#T0:23:respawn:/sbin/getty -L ttyAMA0 115200 vt100
reboot your RPi:
"reboot" or "restart now".
SERIAL wiring for Raspberry PI and a-gsm shield * serial, power and modem control (logical)
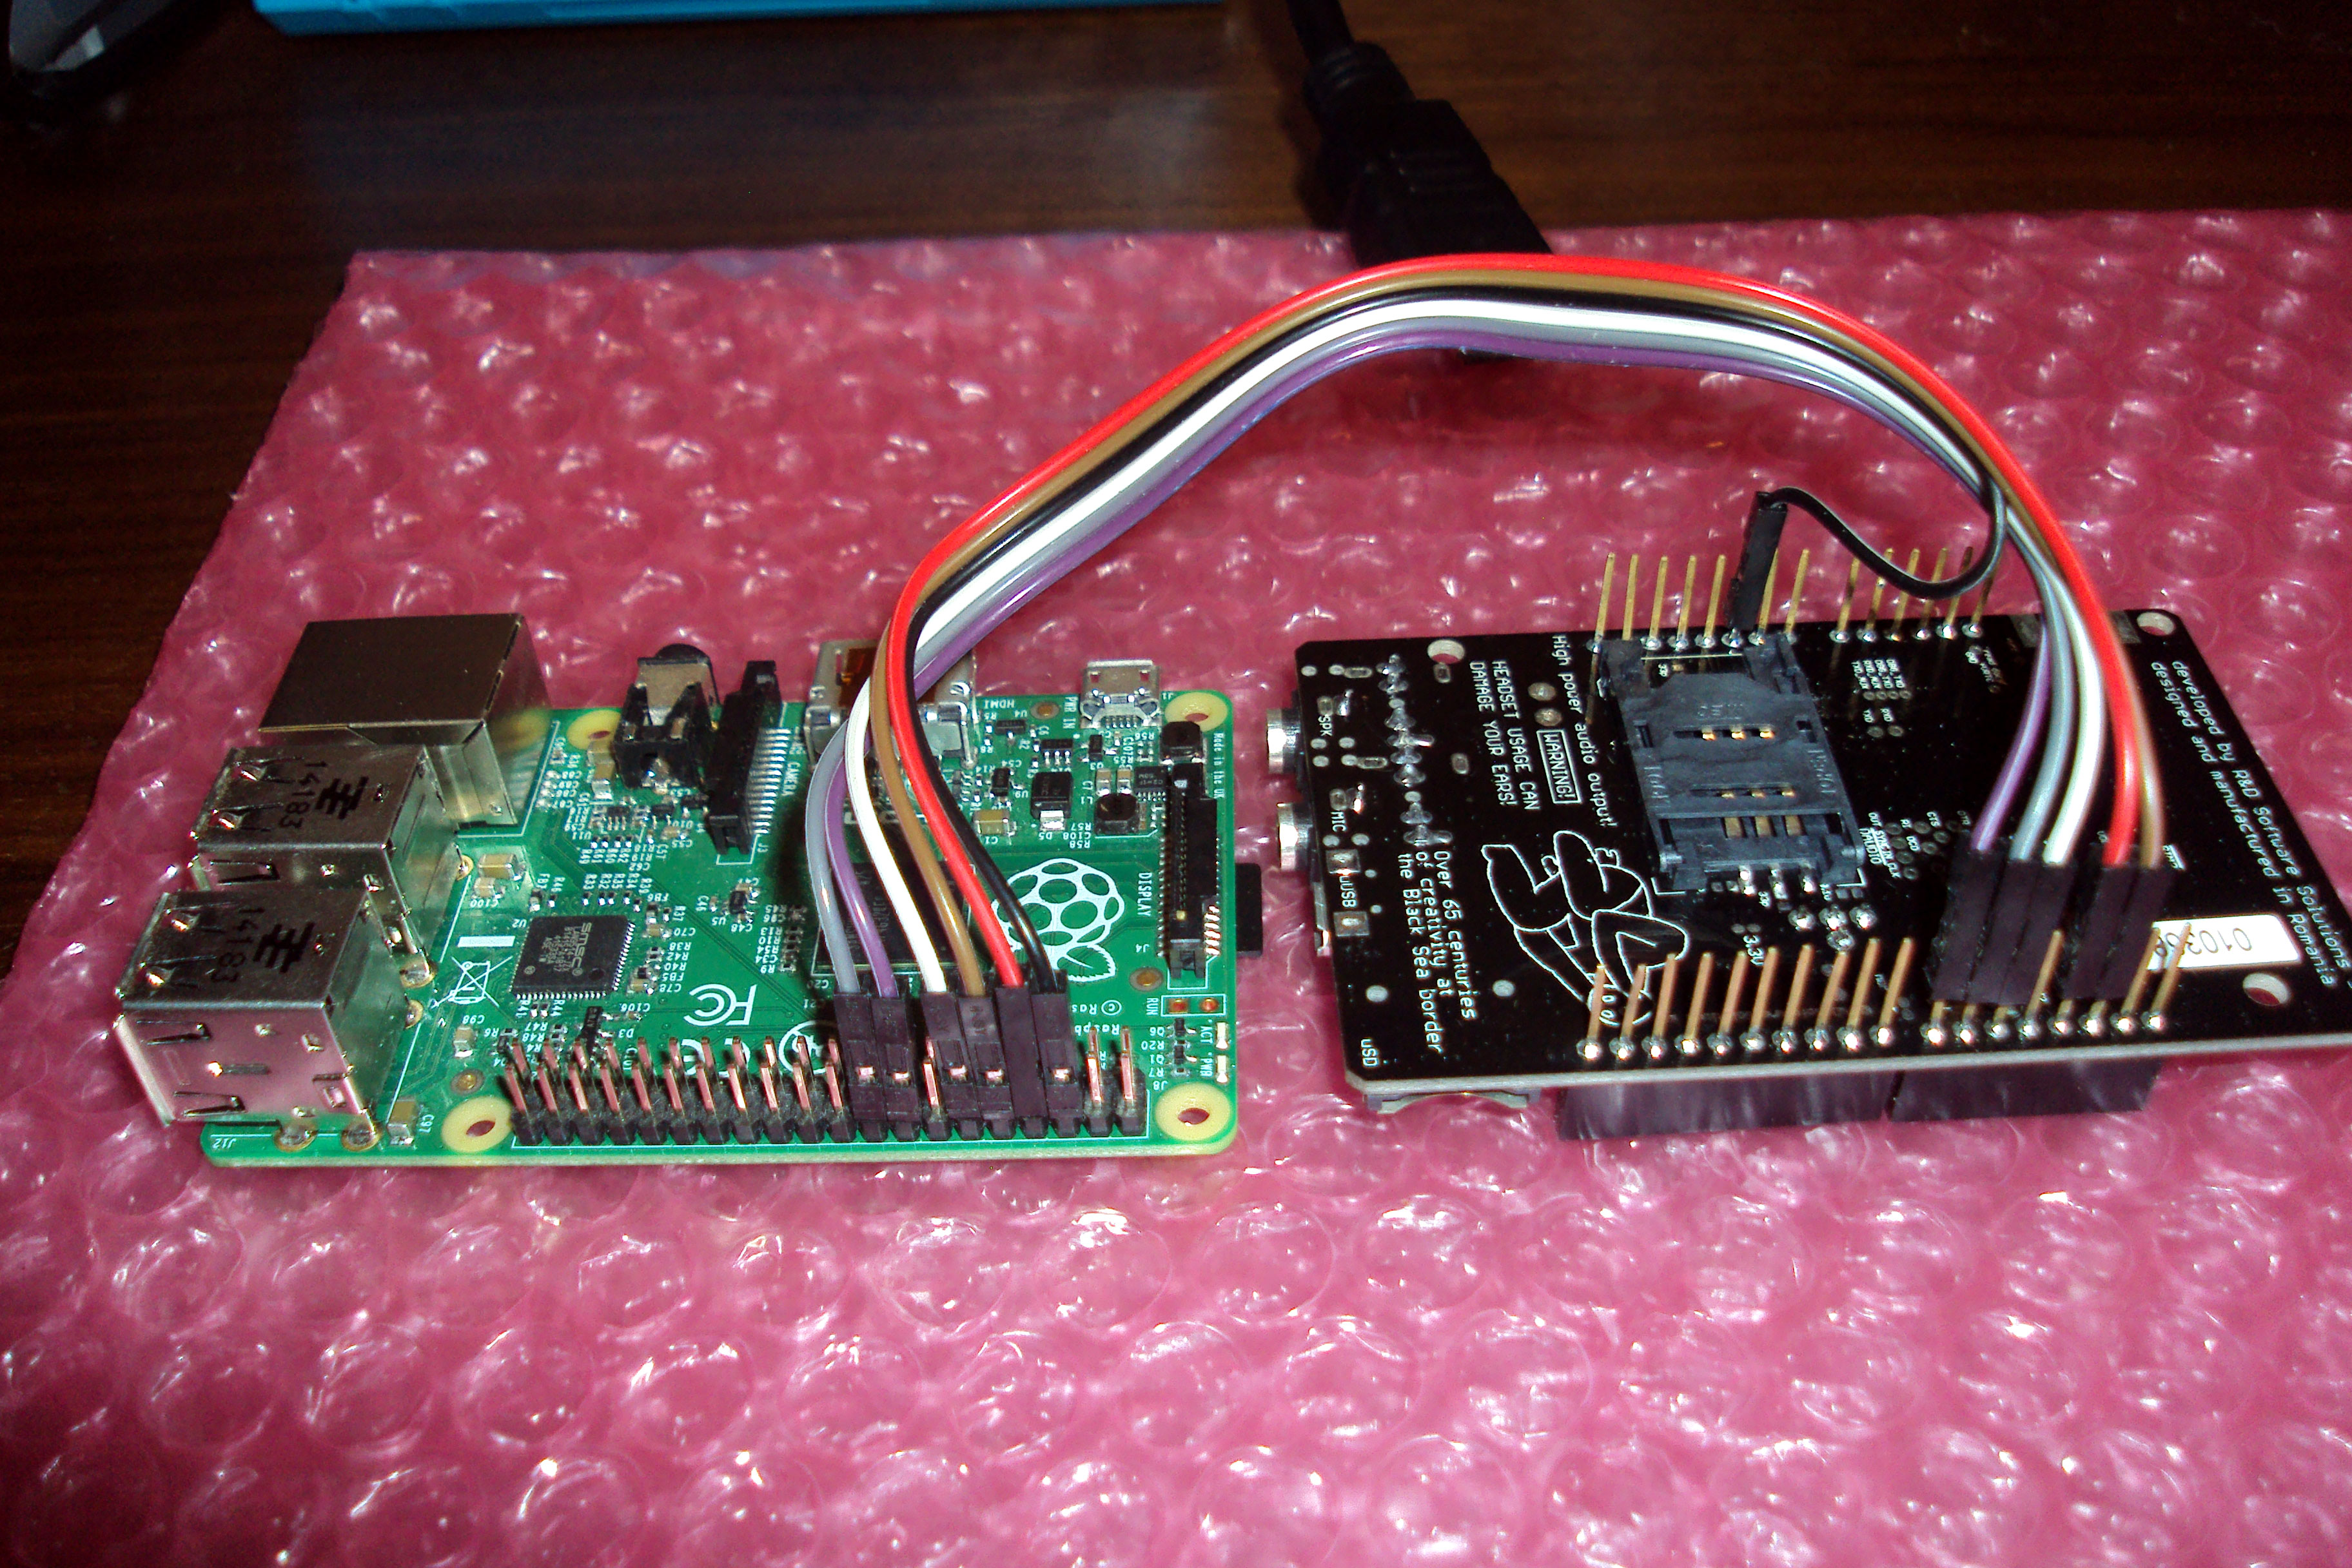
RPI a-gsm serial and control connection
| WIRE ROLE | RPi B+ | a-gsm | ROLE | |
| POWER a-gsm | 16 | D7 - power(UP/DOWN) | modem control line | |
| RESET a-gsm | 18 | D6 - reset | modem control line | |
| a-gsm STATUS | 12 | D5 - status | modem control line | |
| serial TXD0 | 08 | D3 - tx(rxd) | serial communication | |
| serial RXD0 | 10 | D2 - rx(txd) | serial communication | |
| GND | 06/14 | GND - on Arduino power IN connector | common | |
Power using via a-gsm Vin PIN for serial connection
You can use any good quality external power adapter providing a voltage between 5.125V and 38V and supporting a current bigger than 1 A. Connect spare GND PIN located on "Arduino power in connector" on a-gsm shield with the GND pin on your external power adapter. Connect the Vin PIN located on "Arduino power in connector" on a-gsm shield with the Vout pin on your external power adapter. The a-gsm's POWER supply input selector must be in "use Vin" position.Power via USB variant for serial connection
Power the a-gsm board over USB, using a good quality power adaptor (eg. your Arduino/iPhone power adaptor). The a-gsm's POWER supply input selector must be in "use USB" position.Power using the RPI 5V PIN for serial connection
Connect PIN 02/04 on Raspberry PI B+ extension connector with 5V PIN on "Arduino power in connector" on a-gsm shield. The a-gsm's POWER supply input selector must be in "use 5V" position.
USB wiring for Raspberry PI and a-gsm shield * serial, power and modem control (logical)
| WIRE ROLE | RPi B+ | a-gsm | ROLE | |
| POWER a-gsm | 16 | D7 - power(UP/DOWN) | modem control line | |
| RESET a-gsm | 18 | D6 - reset | modem control line | |
| a-gsm STATUS | 12 | D5 - status | modem control line | |
| serial TXD0 | 08 | D4 - tx(rxd) | serial, DO NOT WIRE!!! | |
| serial RXD0 | 10 | D3 - rx(txd) | serial, DO NOT WIRE!!! | |
| GND | 06/14 | GND - on Arduino power IN connector | common | |
| USB cable | USB port(any) | micro USB type | serial usb bridge |
Power using via a-gsm Vin PIN for USB connection
You can use any good quality external power adapter providing a voltage between 5.125V and 38V and supporting a current bigger than 1 A. Connect spare GND PIN located on "Arduino power in connector" on a-gsm shield with the GND pin on your external power adapter. Connect the Vin PIN located on "Arduino power in connector" on a-gsm shield with the Vout pin on your external power adapter. The a-gsm's POWER supply input selector must be in "use Vin" position.Power via USB variant for USB connection
YOU MUST use a special USB Y adapter cable! Power the a-gsm board over USB, using a good quality power adaptor (eg. your Arduino/iPhone power adaptor), using "POWER ONLY" end of your USB Y adapter cable. The "DATA ONLY" end of your USB Y adapter cable, must be connected to any RPI USB port. The a-gsm's POWER supply input selector must be in "use USB" position.Power using the RPI 5V PIN for USB connection
Connect PIN 02/04 on Raspberry PI B+ extension connector with 5V PIN on "Arduino power in connector" on a-gsm shield. The a-gsm's POWER supply input selector must be in "use 5V" position.WARNING: Regardless the powering schema variant chosen, be sure than you check twice the wiring and be warned regarding the GROUND possible voltage differences(when use external power adapter), before you power the RPI a-gsm bundle.
RPI a-gsm USB connection, software setup considerations
Tested over 2015-02-16-raspbian-wheezy on RPI2
After USB cabling you will notice in the /var/syslog:
... raspberrypi kernel: [ 2481.862240] usb 1-1.3: cp210x converter now attached to ttyUSB0
Under RPI, must be the same behavior!
In downloaded example files or in your own Python files , you must set:
agsm = serial.Serial("/dev/ttyUSB0", serialSpeed, timeout=1)
instead of,
agsm = serial.Serial("/dev/ttyAMA0", serialSpeed, timeout=1)
We suggest to you to use the newest RASPBIAN versions https://www.raspberrypi.org/downloads/. As backup, if something goes wrong, you can still use the 2015-02-16 version, used by us for testing. You can download it from here:
http://itbrainpower.net/a-gsm/downloadables/2015-02-16-raspbian-wheezy.zip
Thats all you need in order to be able to use directly the Raspberry PI and a-gsm shield with USB.
DOWNLOAD our RaspberryPI RUNNING(COMPILABLE) CODE EXAMPLES here >>
a-gsm series GSM / GPRS / DTMF / SMS Raspberry PI shield examples (tar.gz)