About this
This tutorial address the Raspberry PI 5, Raspberry PI 4, 3B+, 3B, 3A+, II, B, Zero and Zero W software integration with itbrainpower.net modems [full size or modular, 2G / 3G / 4G or LPW LTE CATM], with focus on our u-GSM modem family [~22 modem types having 1/2 RPI HAT interface and BBB P9 interfaces].
Most of the hardware related notes regarding modem integration will be exemplified for u-GSM modem, but will find references for the other itbrainpower.net modems.
![Raspberry PI 5 with itbrainpower.net u-GSM LTE modem [EG95/EG91/BG96/BG95-Mx]](/images/Raspberry_PI5_u-GSM-Debian12_integration_01_1200x800px.png "Raspberry PI 5 with itbrainpower.net u-GSM LTE modem [EG95/EG91/BG96/BG95-Mx] :: CLICK TO SEE FULL SIZE")
Required parts:
- Raspberry PI 5 / 4 / 3B+ / 3B / 3A+ / II / B / Zero / Zero W
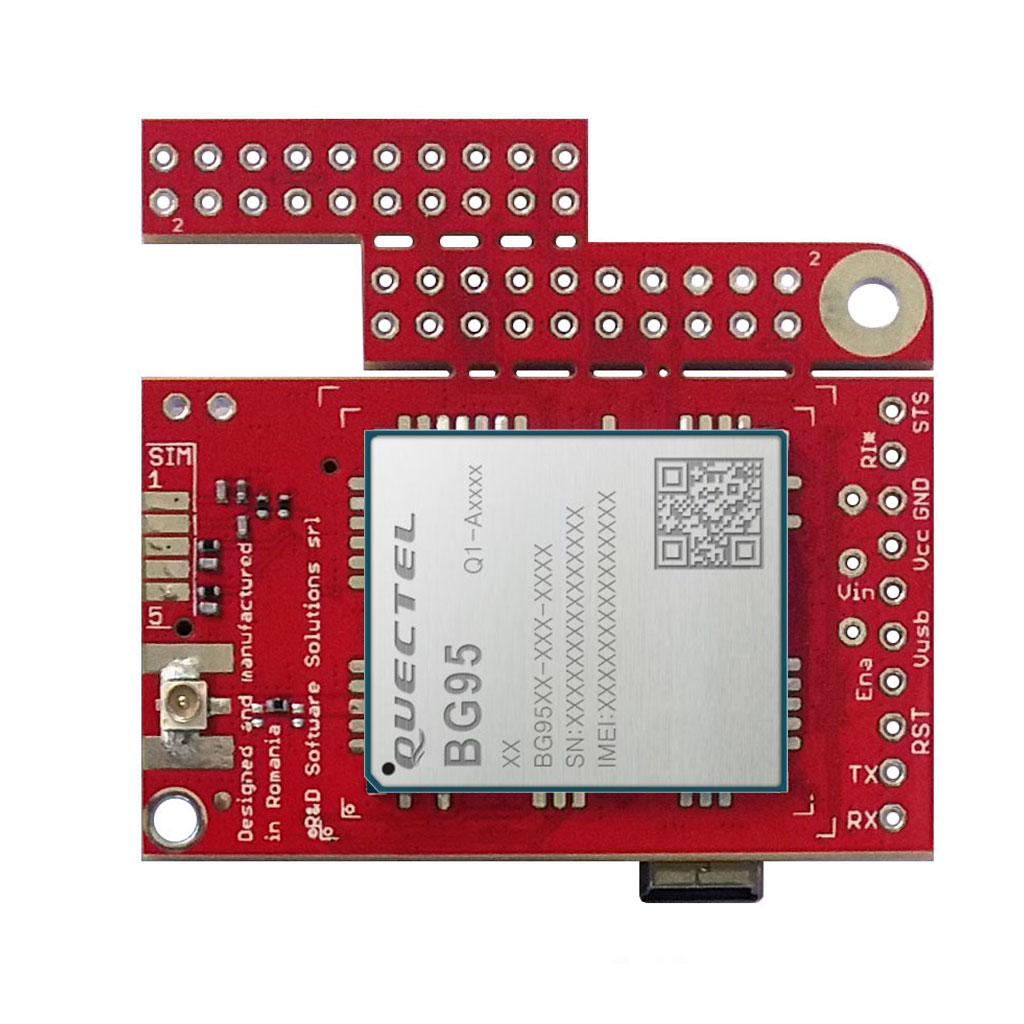
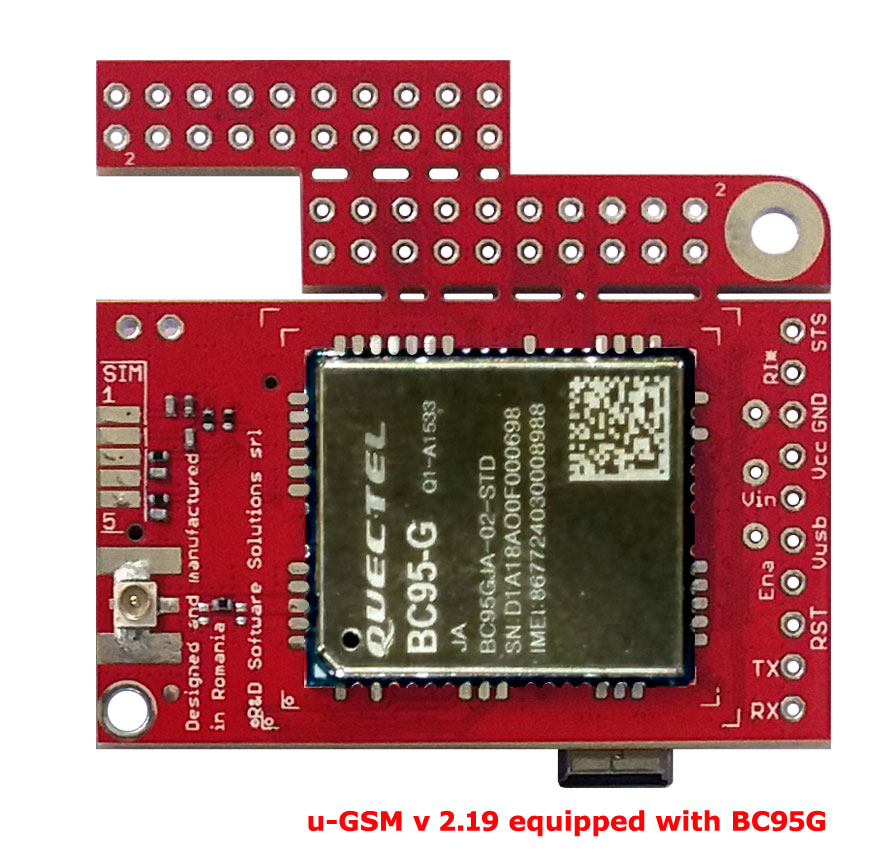
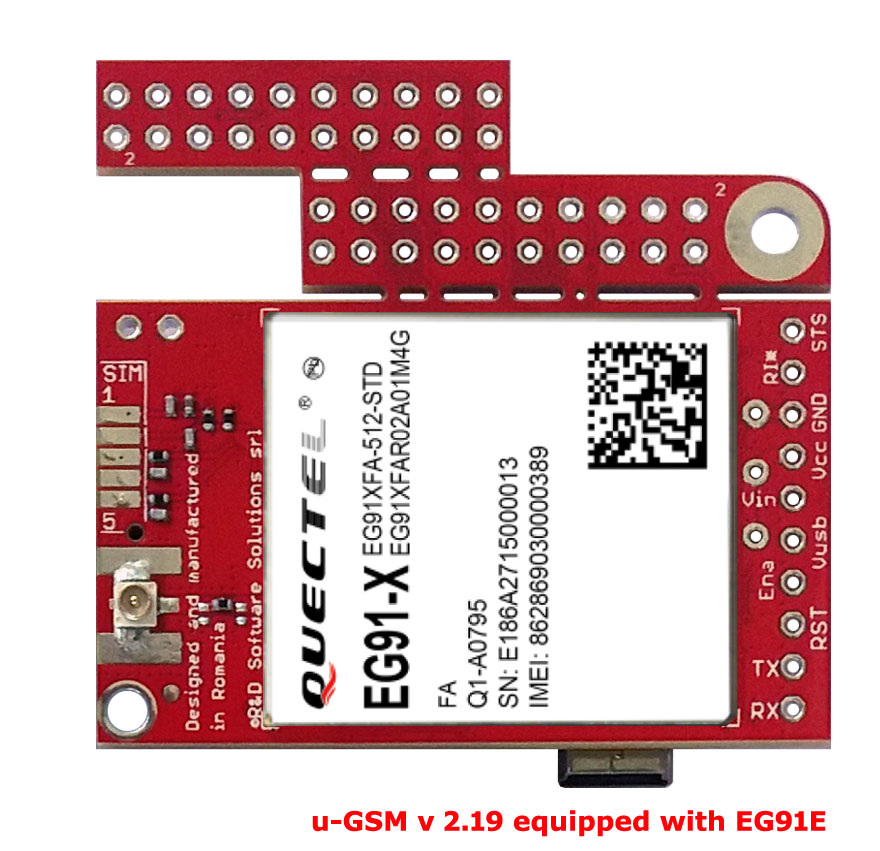
- any u-GSM modem uFL version (excepting BC95G version*) or
- any first version of ITBP modular modem (c-uGSM, h-nanoGSM, d-u3G or l-LTE **), and mandatory one of the following:
- 1pcs. x LiPo battery [3.7V, > 250mA]***, or
- 1pcs. x super-capacitor for itbrainpower.net modems***.
* BC95G (do not be confused with BG95-M2 or BG95-M3) does not have ppp support included.
** first generation itbrainpower modular modems does not have RPI interface integrated, but still can be interfaced with RPI using wires. Same interfacing directives may be applied for u-GSM modems SMA version!
IMPORTANT => Due to modem powering from the RPi rail, one LiPo/LiION battery OR super-capacitor are REQUIERED for proper u-GSM functionality! *
* for low power LTE u-GSM modems used in LTE-CATM or NBIoT mode only [BG95-M2 and BG96/BG95-M3 having 2G mode restricted], the LiPO battery or the super-capacitor can be safely replaced with 1000-1500uF/6.3V LOW ESR capacitor.
Some RaspberryPi [5 or other] and u-GSM hardware references
itbrainpower.net u-GSM shield it is the worldwide first (and the only one) modular modem that supports ALL deployed GSM standards [LTE NB IoT / LTE CATM1 / LTE CAT4 / LTE CAT1 / UMTS-3G / GSM-2G] in one unified design! Read u-GSM part numbers, radio protocols and country coverage to find the modem suitable for your application.
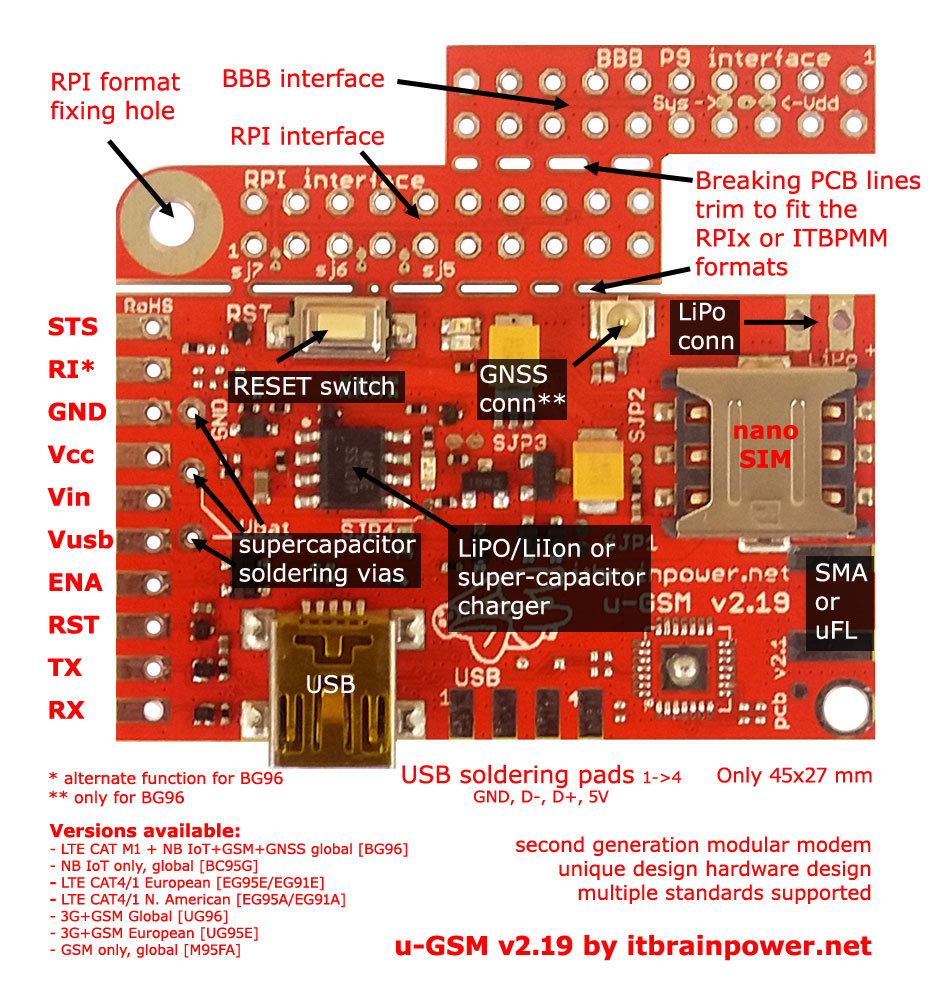

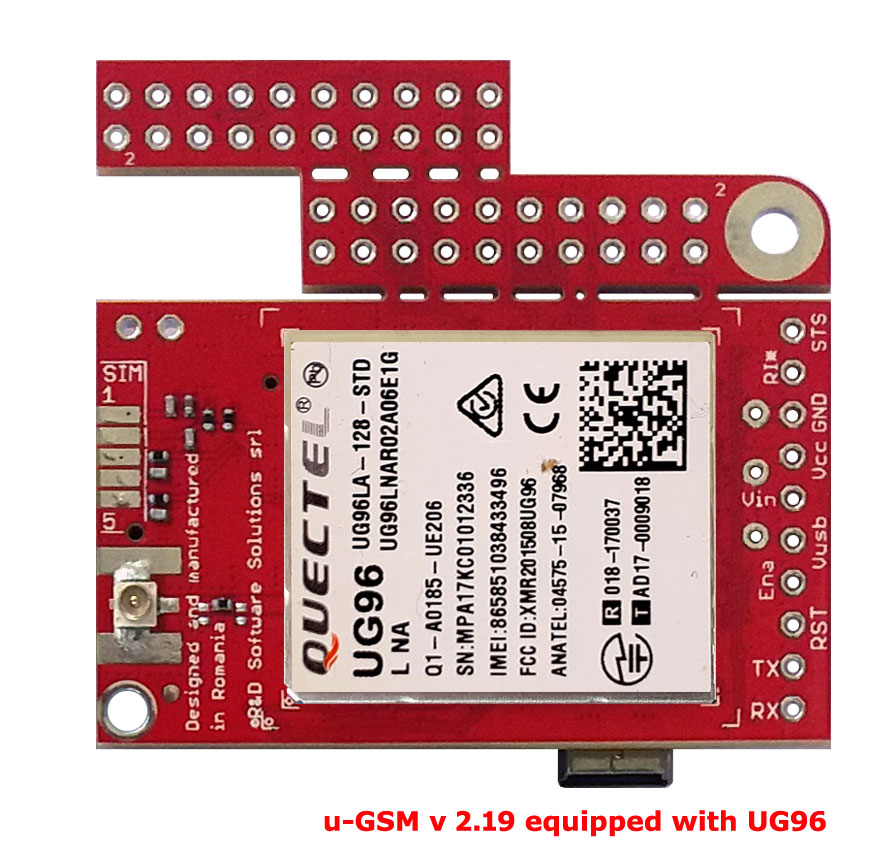
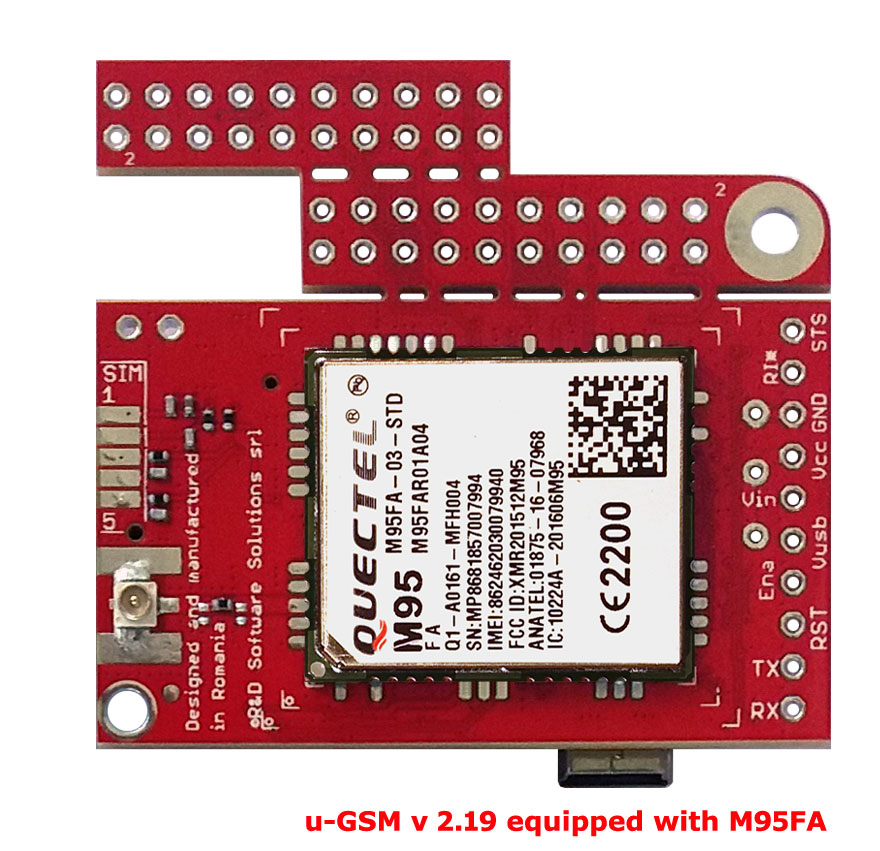

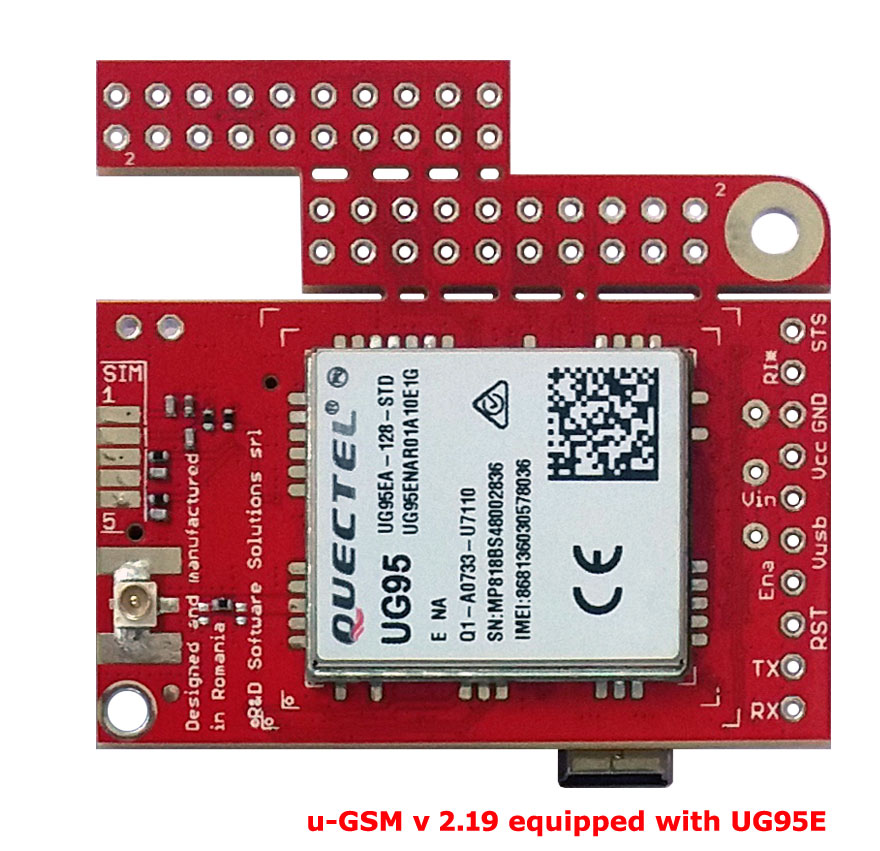
u-GSM RaspberryPI interface [and ITBPMM interface]

RaspberryPi interfacing w. u-GSM via embedded RPi hat interface
RaspberryPI with u-GSM modem + super-capacitor assembly

More RaspberryPI u-GSM hardware integration info.
RaspberryPI with u-GSM modem + LiPO assembly

More Raspberry u-GSM hardware integration info.
HINT: for low power LTE modems used in LTE-CATM or NBIoT mode only [BG95-M2 and BG96/BG95-M3 having 2G mode restricted], the LiPO battery or the super-capacitor can be safely replaced with 1000-1500uF/6.3V LOW ESR capacitor.
For a painless hardware integration (including PCB trimming how to) mandatory reading: u-GSM and Raspberry Pi hardware integration guidelines and antenna notes.
Dedicated hardware information for modem interfacing via ITBPMM interface using wires
This applies to u-GSM modem SMA version and first version of ITBP modular modems (c-uGSM, h-nanoGSM, d-u3G or l-LTE). You may ignore this if the u-GSM integration it's performed as described above.
Simple connect the wires as shown bellow:
RPI PIN12 [GPIO18] <====> ITBPMM STS
RPI PIN16 [GPIO23] <====> ITBPMM ENA / ITBPMM POW
RPI PIN18 [GPIO24] <====> ITBPMM RST* / ITBPMM RST
RPI PIN08 [GPIO14 / TX] <====> ITBPMM TX
RPI PIN10 [GPIO15 / RX] <====> ITBPMM RX
RPI PIN06 [GND] <====> ITBPMM GND
RPI PIN04 [5V] <====> ITBPMM Vin
Due to modem powering from the RPi rail, one LiPo/LiION battery OR super-capacitor are REQUIERED for proper functionality!
RPI(any) and GSM/LTE antenna/pigtail hints for u-GSM, c-uGSM, h-nanoGSM, d-u3G and l-LTE modems
For proper assembly functionalty, you may like to read the guidelines here.
Dedicated hardware information for full size itbrainpower.net modems interfacing
This applies to a-gsmII, b-gsmgnss and a-gsm modems. You may ignore this if do not use one of those modems.
Simply follow the logical wires (ON/OFF, RESET, STATUS, TX and RX ) interfacing section here. Do not power your modem from RPI5 rail, just power it from independent power supply via Vin and GND pads!
RPI5 + Linux Debian 12 [RaspberryPI OS lite bookworm] install information, add on and hints
Debian12 [bookworm] python and shell script support packages [PPP handling samples, ON/OFF shell scripts, python GPIO port library and python test script] for u-GSM modems are available, here: u-GSM shield download section. For other itbrainpower.net modems check here (do not forget to select your modem type). Those pachages are included in the RPI5 image patched for itbp modems described bellow.
RPI5 power supply --> please use proper power supply [5.1V, 3 A] as the Raspberry original one.
RPI5 heating issue --> even bellow you should find some config.txt directives that should offer some space for the processor temperature, you shoud use a proper cooling mechanism. In this case, you shoud use an extra tall Raspberry Pi 2x10 Header that fits the cooler profile. An other approch is to take into account the wires interfacing presented above (as for SMA modem variants). If you know about software setup that allow additional thermal window please contact me.
Easy and fastest approach - use the RPI5 image (bookworm) patched for itbp modems:
Access the download section, select your shield type and download the last available RPI image patched for ITBP modems. This image is based on RaspberryPI OS Lite [Debian 12 bookworm] 2023-12-11.
One micro SD card [at least 4Gb #] it is required for installation of this Linux image [Install a RPi image how to or google for it.]
Some features:
* dinamic DHCP address for ETH0
* static ETH0:0 IP address [192.168.122.200]
* sshd deamon enabled
* enabled root access via ssh w. password auth [1234 as default password]#
* restaured "pi" user, having "raspberry" as password#
* mapped USB drivers for itbrainpower.net UMTS / LTE modems [you can use our modems connected via USB w. the RPI]
* five additional packages installed [ppp, python 2.7, python-serial, mc and mtr]
* disabled avahi-daemon
* GPIO python port library designed to replace the missing GPIO python class
* modem ON, modem OFF scrips and PPP handling sample for all itbrainpower.net modems
* python test modem and more scripts for all itbrainpower.net modems
* compact size 4Gb image [expanded] #
# security warning ==> at least, you shoud change those two default passwords!!
If you like to find what's changed/patched in this Linux image or you like to take a try and patch your Linux distribution, read next chapter.
Custom install [Debian bookworm lite]
Download and install last RaspberryOS Lite image from https://www.raspberrypi.com/software/, or use your image. For SD image writing, Win32DiskImager it's a good choice.
a. after boot, select your keyboard type and setup the initial Linux user and the associated password. Note for other user name as "pi": later, in python and modem support scripts may be requiered to update some paths.
b. after initial login, switch to root account [sudo su]. Note: all future tastks require root rights...
c. run:
sudo apt-get update
sudo apt-get install ppp mc mtr
d. Enable RPI serial port [/dev/ttyAMA0] and sshd. Run:
sudo raspi-config
Select "MENU 3", "option I1" [SSH] and set "enable sshd"
Select "MENU 3", "option I5" [SERIAL PORT] and set "login shell NO" & "serial hardware port YES"
Save the configuration.
e. install python2.7 and python-serial
mcedit /etc/apt/sources.list - at the end add following line
deb [trusted=yes] http://archive.debian.org/debian/ stretch contrib main non-free
sudo apt-config update - ignore the warnings.
sudo apt-get install python2.7 python-serial
f. enable root access via ssh using password (optional)
mcedit /etc/ssh/sshd_config - add following line
PermitRootLogin yes
g. optional, disable avahi daemon - run:
systemctl disable avahi-daemon.socket avahi-daemon.service
systemctl mask avahi-daemon.socket avahi-daemon.service
systemctl stop avahi-daemon.socket avahi-daemon.service
h. add eth0 file in /etc/network/interfaces.d containing:
auto eth0
iface eth0 inet dhcp
post-up /sbin/ifconfig eth0:0 192.168.122.200 netmask 255.255.255.0
pre-down /sbin/ifconfig eth0:0 down
i. enable the new network configuration. Run:
sudo systemctl restart networking
systemctl status networking.service
ifconfig
j. optional - "/boot/config.txt" guidelines for RPI5. We recomend to add:
change arm_boost=1 into arm_boost=0
and add the following section (those should somehow help to cool down the processor):
[pi5]
arm_freq=900
core_freq=250
isp_freq=250
v3d_freq=250
sdram_freq=450
k. optional - "/boot/config.txt" guidelines for RPI3 (legacy). We recomend to add:
[pi3]
core_freq=250
dtoverlay=pi3-disable-bt
dtoverlay=pi3-miniuart-bt
l. edit "/etc/rc.local" [run mcedit /etc/rc.local] and add following lines just above exit 0:
/sbin/modprobe --first-time usbserial > /dev/null 2>&1
echo 2C7C 0121 > /sys/bus/usb-serial/drivers/generic/new_id
echo 2C7C 0125 > /sys/bus/usb-serial/drivers/generic/new_id
echo 2C7C 0191 > /sys/bus/usb-serial/drivers/generic/new_id
echo 2C7C 0195 > /sys/bus/usb-serial/drivers/generic/new_id
echo 2C7C 0296 > /sys/bus/usb-serial/drivers/generic/new_id
UPDATE 2026-02-28 >> if your modem is u-GSM w. EG915U add:
echo 2C7C 0901 > /sys/bus/usb-serial/drivers/generic/new_id
UPDATE 2026-02-28 >> if your modem is u-GSM w. C16QS or C17QS add:
echo 05C6 9330 > /sys/bus/usb-serial/drivers/generic/new_id
m. Ready (but do not forget to download itbrainpower.net modem scripts and ppp support files, see above).... reboot your pi
Debian 12 and RaspberryPI 5 (and legacy) GPIO manipullation
In the RaspberryPI OS Lite 2023-12-11 [Debian 12.1], version used here, the only shell script designated for GPIO handling found is "/usr/bin/pinctrl". Also, the "RPi.GPIO" python library can not be found.
This why, I decided to write my own GPIO python library - "ITBP_gpioRPI5" -[lite version, designated only to control GPIO18, GPIO23 and GPIO24 - pins used for control the interfaced modem]. This python lib is included in both "RPI5 DEBIAN image patched for ITBP modems" and "Debian12 [bookworm] python and shell script support packages" downloads presented above.
Make sure you have installed python2.7 and python-serial.
RaspberryPI 5 - modem USB connectivity notes inside case [how to unleash the beast]
This one is a little hack that will allow you to gain the full functionalty and speed from your u-GSM modem. The [LTE / LTM+NBIoT] modem's USB offers two high speed UART ports and, for models having GPS/GNSS module embedded, one UART port designated for GNSS data exchage.
WARNING: by doing this you are in danger to damage your boards and this will void the boards warranty!!!
Use four wrapping wires of different colour. Estimate the distance between the u-GSM USB soldering pads and RPI5 USB solderings [on back of the PCB]. Add 2-3 cm as margin. Cut the wrapping wires and twist them.
You should solder them on both boards as bellow [when doing the solder, just adjust the lencht of the wires as much as possible]:
[TP74] RPI5 USB Vusb <======> u-GSM [USB PADS] Vusb identify the u-GSM USB PADS
[TP70] RPI5 USB D- <======> u-GSM [USB PADS] D-
[TP71] RPI5 USB D+ <======> u-GSM [USB PADS] D+
[TP60] RPI5 USB GND <======> u-GSM [USB PADS] GND
Under Debian 12, the u-GSM [USB] UART ports will be mapped as /dev/ttyUSBx. More info about may be found in "/etc/ppp/peers/u-GSM" and python test modem scripts.
If you encounter issues (resource concurrency) in accessing the "/dev/ttyUSBx" by your scripts, you may like to investigate/disable the "ModemManager" daemon.
Hints and resources
- "config.txt" https://www.raspberrypi.com/documentation/computers/config_txt.html
- "vcgencmd" https://elinux.org/RPI_vcgencmd_usage
- list last and on the fly log entries journalctl -f
Under update!
TUTORIAL PROVIDED WITHOUT ANY WARRANTY!!! USE IT AT YOUR OWN RISK!!!!