SOLDERING THE "POWERING, SERIAL AND CONTROL INTERFACE" PINHEADER and the BATTERY CONNECTOR
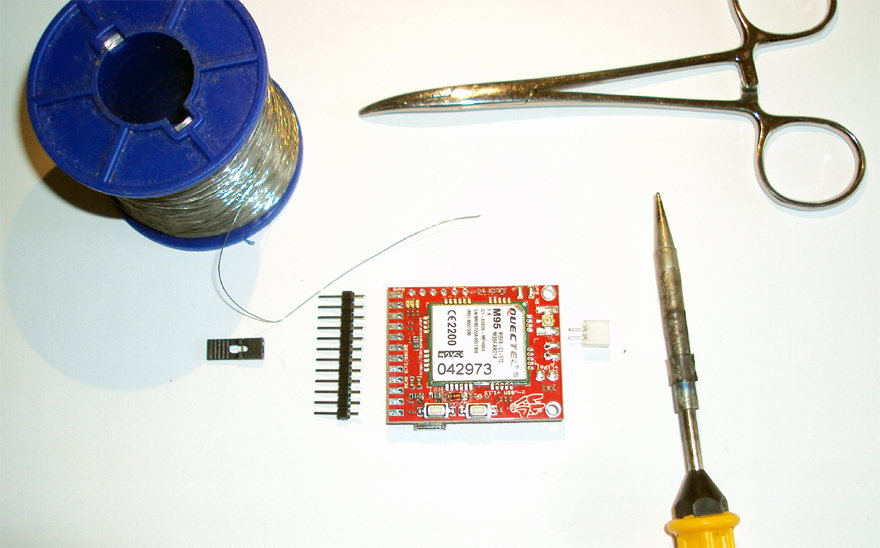
What u need for this step.

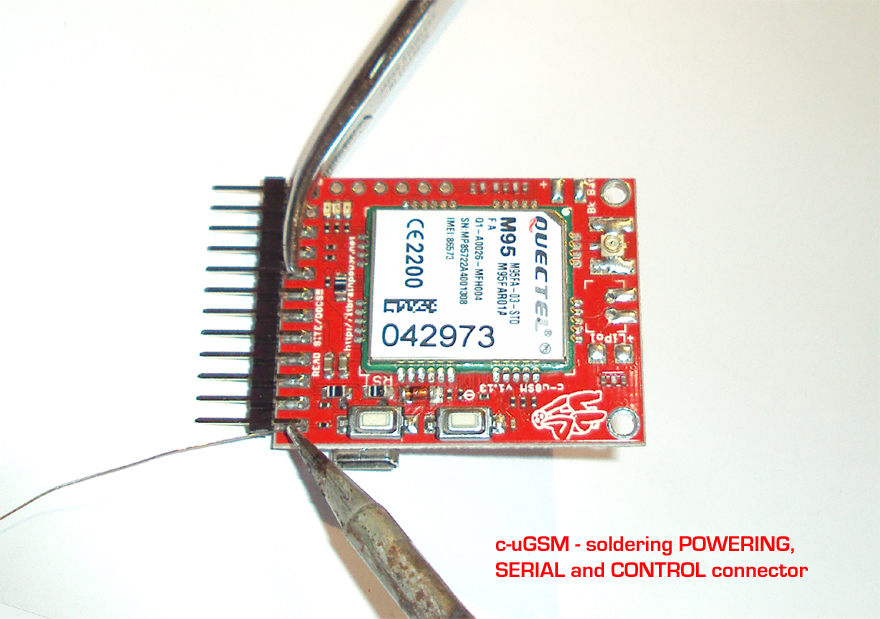
Solder the "POWERING, SERIAL AND CONTROL INTERFACE" connector.

You can use straight or 90 degree 0.1" (2.54mm) pinheaders. Also, there are two option for mounting: horizontal and vertical mounting. Above it is presented the horizontal option.
DO NOT FORGET: c-uGSM use 12xheader and d-u3G 13xheader.
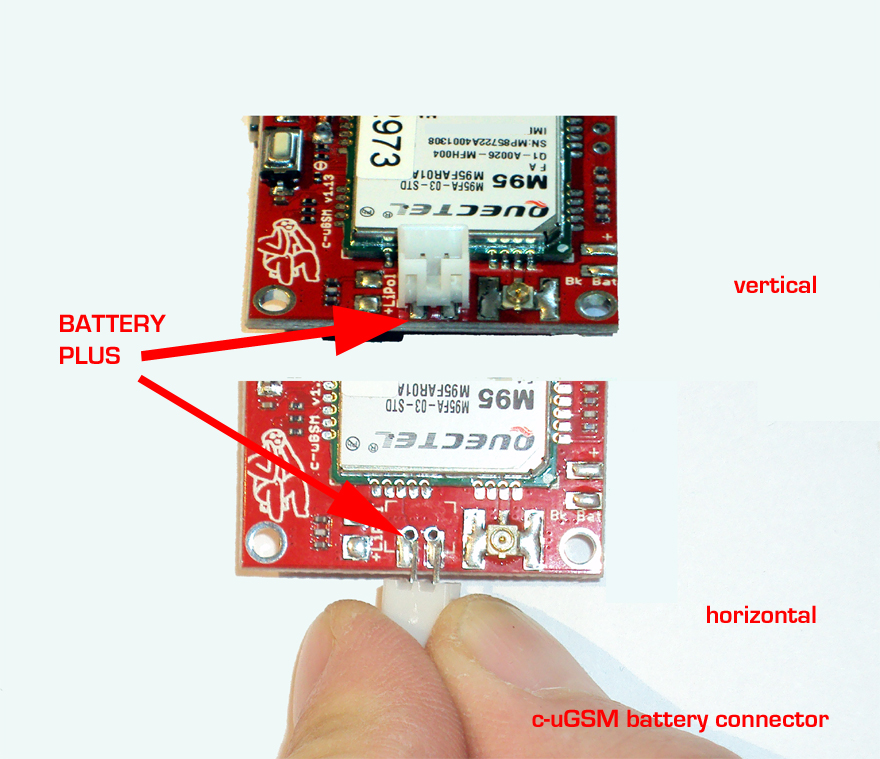
Solder the LiPOL BATTERY connector (only if you intend to use the shield with LiPOL).

Above are presented the horizontal and vertical mounting option for the JST connector. Also, there is an other option: two option for mounting: just solder the LiPOL battery wires on the corespondent PCB pads.
WARNING:
BE VERY CAREFUL AT LiPOL BATTERY POLARITY and/or SHORT-CIRCUITED. TAKE IT SERIOUSLY! You may ask for proffesional assistance!
DO NOT FORGET:
Use (as) low (as possible) power soldering tools.
After each soldering procedure, double check for short-circuites and cold(false) soldering contacts.